


It's what inside that counts.
Breaking down the best seams & edge finishes for loving your clothes, inside & out.


A world without beautifully-finished-interior-clothing is a sad one.
Imagine any of the above films where the underside or inside of the garments had unattractive, unfinished edges that were exposed during monumental dance scenes, action scenes, or wind-in-the-desert-walking à la Lady Jessica in Dune—yuck! OK so maybe you don’t yet care about the ins, only the outs, of a garment—that is where I come in ;) ! There are manifold reasons to take notice of a garment’s insides but, if you must view it on a shallow level: similar to the human body, what happens inside affects the outside. Seams & proper edge finishes— dependent on fabric, design and fit—determine how long apparel may last without busting a seam, acquiring seam grin, fraying, or developing a hole. Seam choice also dictates the amount of pressure clothing can withstand, how clothes feel on your skin, and, as aforementioned, how the exterior may look depending on stitching used. And if you’re human and wear, for example, a jacket unbuttoned, a shirt sleeve rolled up, or sit down in a skirt, said jacket’s interior seams will show, said shirt’s underarm seam will be revealed, and said skirt’s hem will be exposed. So unlike with the human body, a garment’s insides are often visible on the outside which is yet another reason to become seam & edge finish-aware.
Since it’s obvious / easy to understand a garment lining (you see a lining and instantly know it’s all neat/tidy inside & properly weighted), I’m shining the limelight on seams & edge finishes used in unlined garments. The three most common seams are: plain (with finished edge seam allowances), flat felled, and French seam. As for edge finishes, the three most commonly used high end constructions are: bindings, facings, & blind hems (machine or by hand).
Seems like you want to learn more about seams.
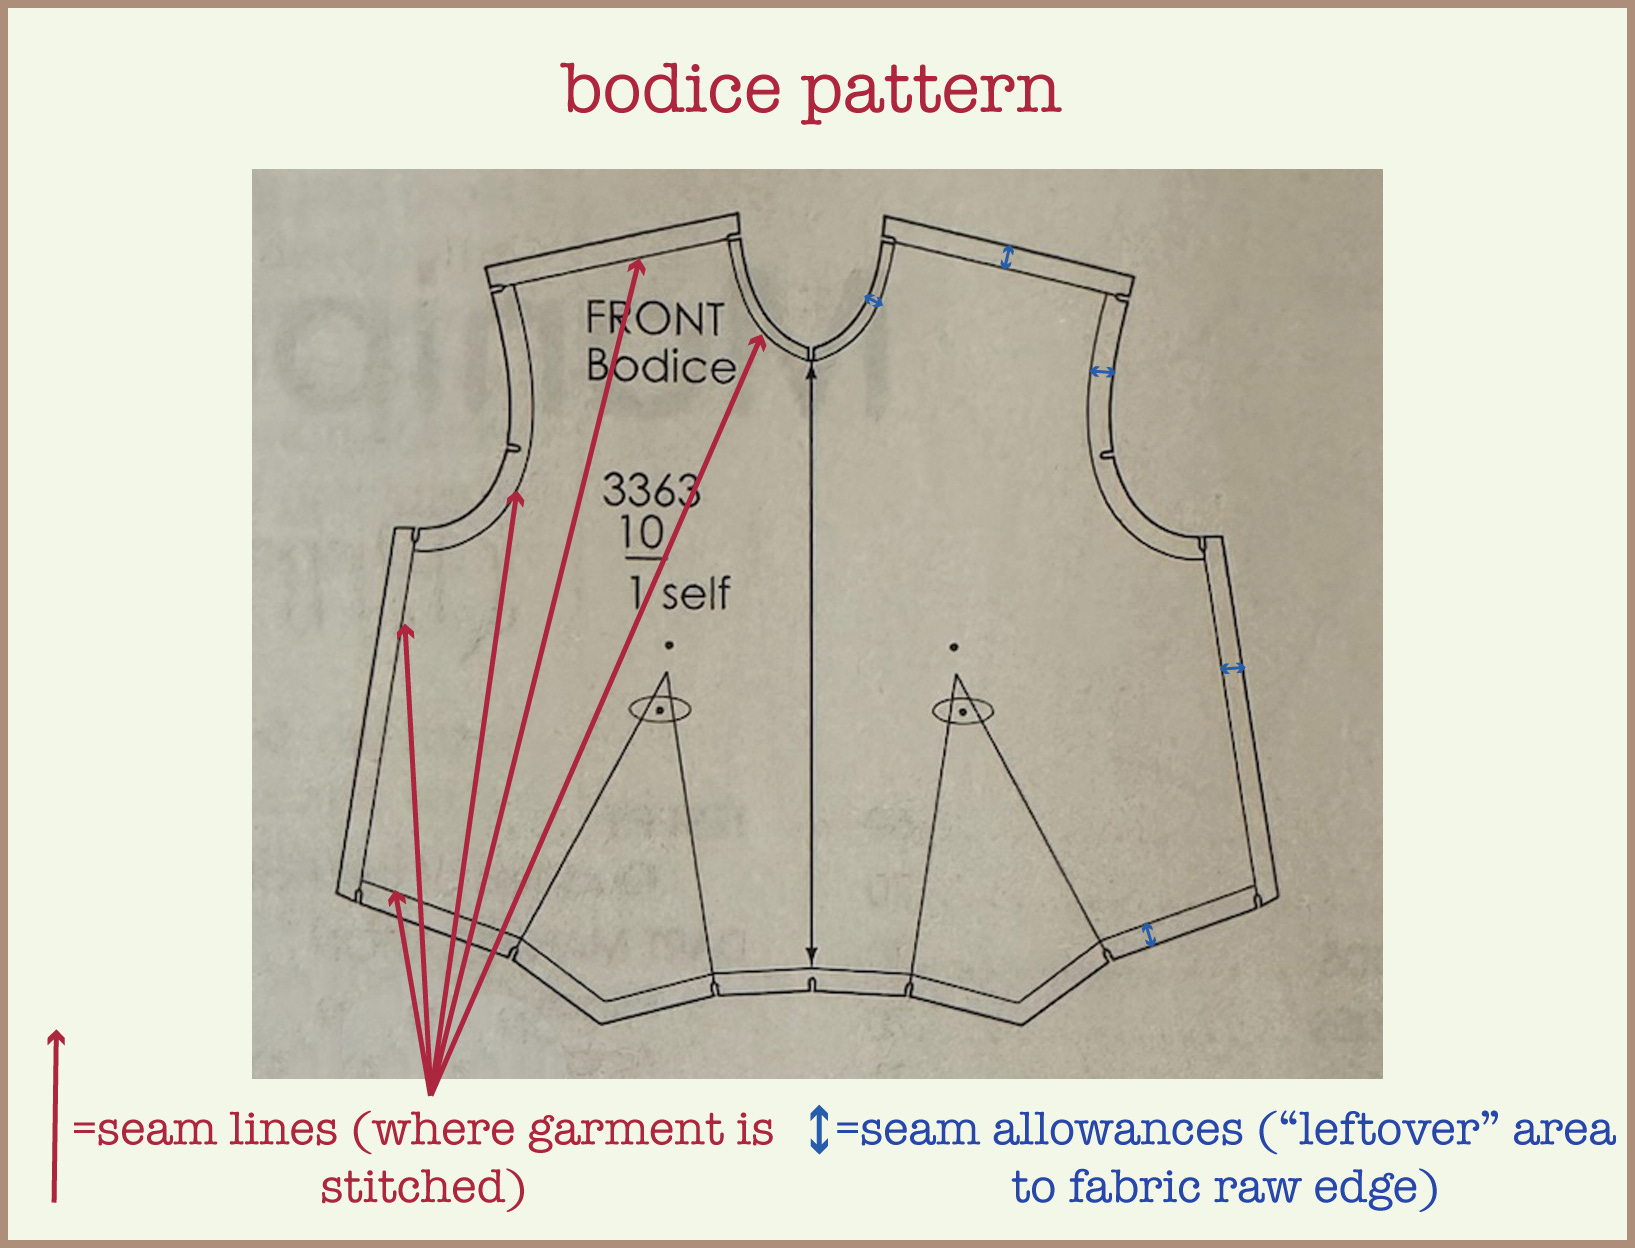
If you’re really just starting out, a seam is when two pieces of fabric are sewn together. A seam allowance is the “extra” fabric edge inside the garment. The seam allowance and how it is manipulated is—as far as garment construction goes—where you’ll see the biggest difference between cheap clothing and higher end. Depending on the seam choice, it’s also where you similarly see lasting quality versus not-built-to-last (nor look beautiful inside). Most designer or bespoke suiting, for instance, come with 1” or greater seam allowances to make alterations more achievable. If you take a garment in or out, the seam allowances make up the space where these changes are made; a tailor shifts the seam further in towards the body for a smaller fit, or further away from the body for a larger fit—along the seam allowance. It’s also worth noting that the use of larger seam allowances (1/2” or greater) is more costly because they require more fabric, and fabric ain’t cheap, especially in a wool suit.

It’s plain to seam: you gotta know about plain seams.
A plain seam seam is when pieces of fabric are stitched together. Period. What happens next with the SAs (let’s use an acronym for the long, wordy “seam allowance”) directs what type of seam and edge finish are selected. A plain seam can have pressed open SAs (like the above image)—but you can’t leave those SAs with raw edges, because the garment would fray to bits. The most standard modern edge finish is the overlocked edge (below, right). This is made by a separate machine called a serger. Don’t be alarmed if you see overlocked edges on certain garments that are in fact high end—it’s all about the seam, fabric and the seam location. If you see overlocked SA edges where the SAs are overlocked TOGETHER, and there is a tiny SA measurement (like a 1/4” or less), and it’s used on a basic seam location like a straight side seam on a blouse, this is a time for concern. This construction combination was most likely from some sort of H&M / other fast fashion sweat shop origin. Besides the fact that CRACD is about not supporting businesses that use these types of unethical labor practices, garments made with these cheap techniques will also not last, nor will they look lovely inside.

When you see overlocked SA edges on a garment, make sure the SA width is large, the seam is pressed open (or the SAs are separate-able) and that it’s in a location & fabrication that would render it impossible to achieve a flat felled or other completely clean finished edge: i.e. certain armholes in heavy fabric, or back rise & outseam in wool trousers (see my PRADA wool pants below for reference; in this instance the garment lays best using a plain seam, pressed open SAs).

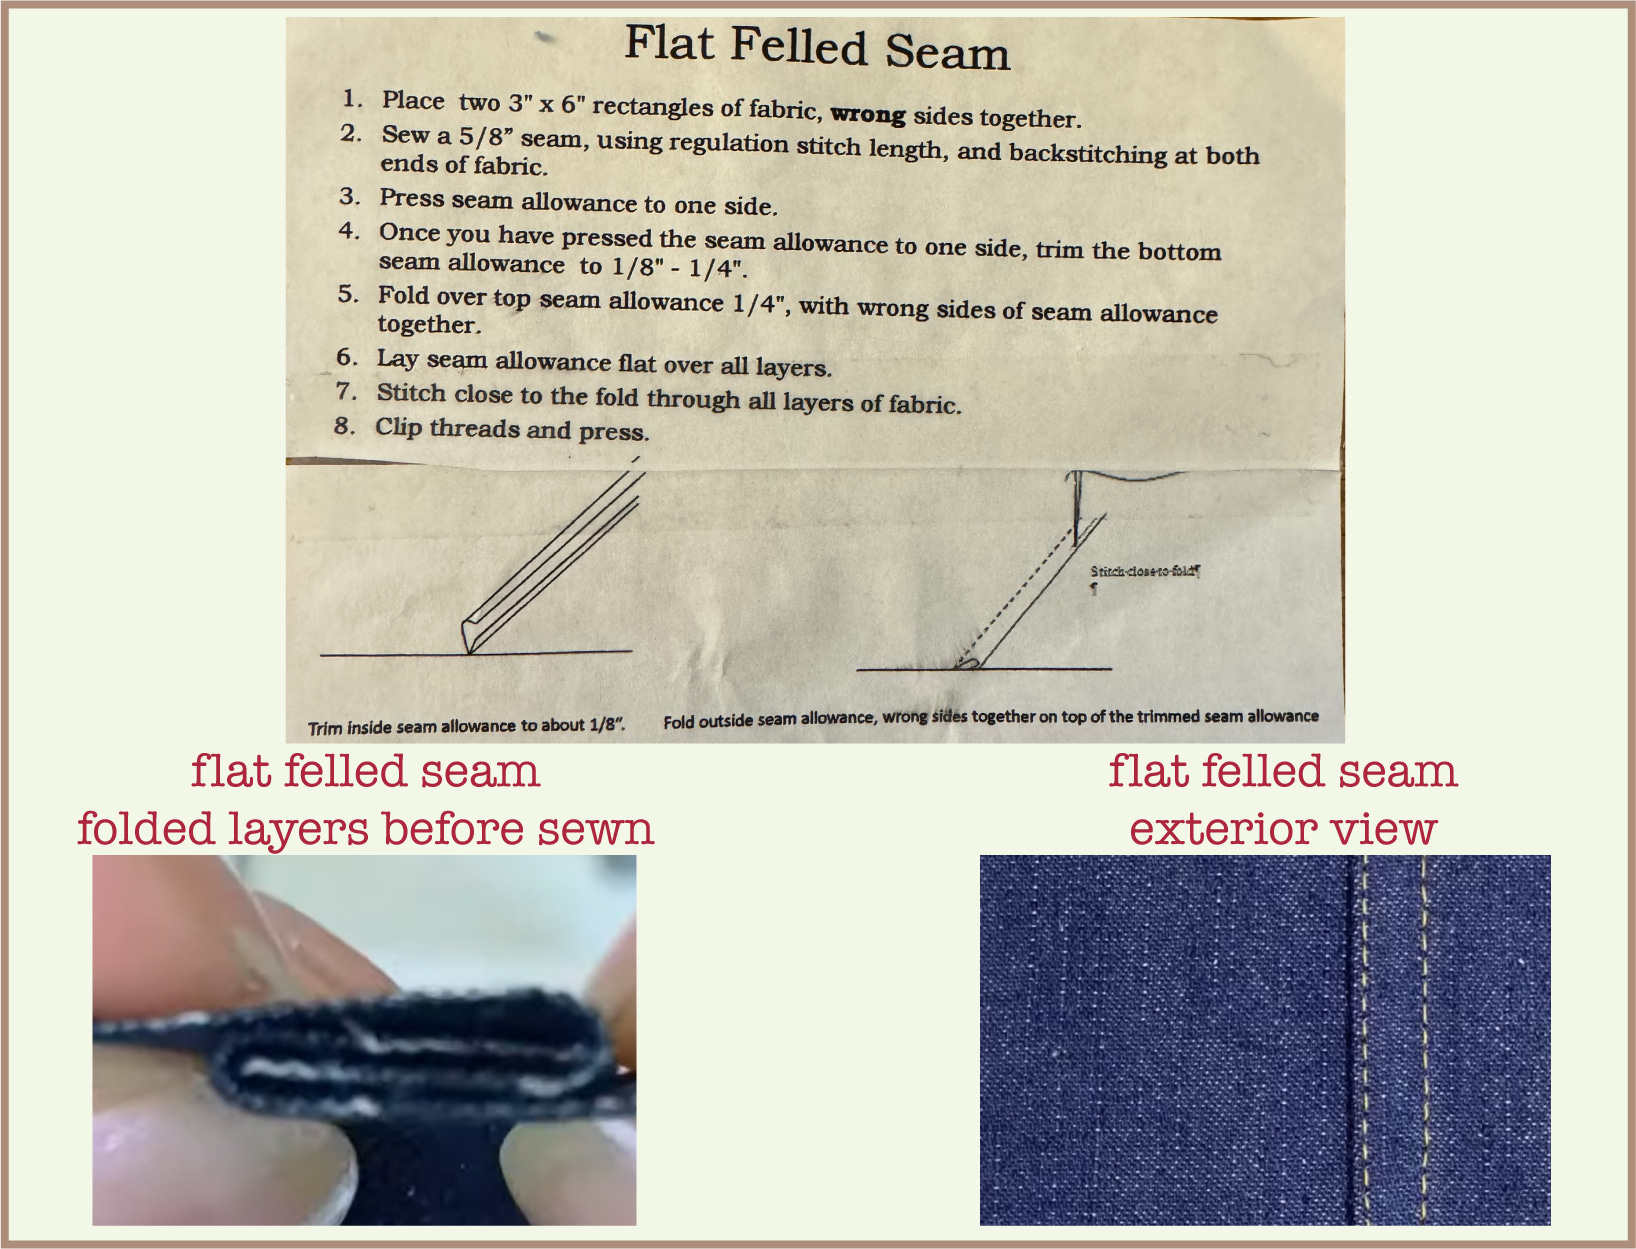
Flat out adoration for flat felled seams.
The best seam for an industrial look with hella topstitching is the glorious flat felled. F.F. seams are made by placing one fabric edge inside a separate folded edge of fabric, then stitching the fold down. This seam requires two “goes” under the sewing machine, and pressing + manipulation of seam allowances. There are multiple methodology options to achieve a flat felled seam, but no matter which one, there are always 2+ orders of operation required. Flat felled seams are bulky since they have four layers of fabric (seam allowances are tucked into the seam, invisible from inside & outside) laying atop one another. This makes F.F. seams ideal for denim, canvas, and shirting. The signature double needle visible topstitch (usually in contrast orange for jeans) is most known in denim and workwear garments.
All this fuss and extra operations means *drumroll please* garments with flat felled seams are more expensive. Plus the materials needed for topstitching a flat felled seam and the labor for making a pattern w/ flat felled seams also add to final cost. That being said, there are some cases where gigantic clothing brands have insane economies of scale and since they order thousands of each item, these companies have the opportunity to streamline the sewing process more through high tech machinery, and pay next to nothing per item. I remember my jaw was on the floor once looking at an OLD NAVY shirt with entirely clean finished & flat felled seams. But it still isn’t the norm; most of the time with fast fashion, you’re gonna see a lot of ugly insides.
The Frenchiest of seams.
Just like the flat felled (and all seams, really), French seams were originally done by hand. French seams can be traced back to the 1860s which is much later than flat felled seams (which were used for underwear that had to withstand a lot—yikes). It’s somewhat unknown why the French seam appeared later, but some believe it’s because seam allowances were often left raw, (and not tucked into a seam style that would hide the SAs on the inside), for non-”high functioning” garments. So a time-consuming specialty seam used in clothes worn to just “hang out”, would be extra—perhaps reserved for the extremely wealthy.
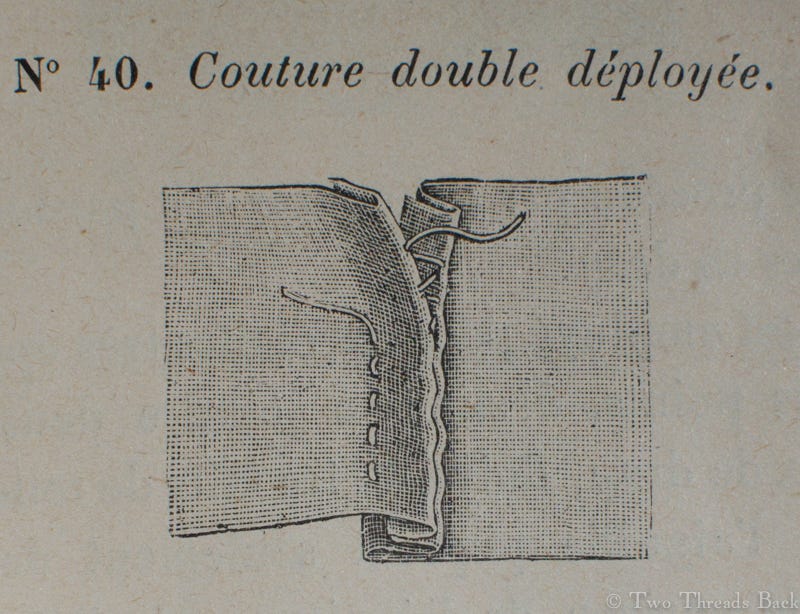
French seams are kind of a mind-f*ck when sewing because, unlike with every other seam under the sun, you start with the wrong sides of your fabric facing each other (just a sewing nerd-out-ism for you). After stitching wrong sides together, the fabric is pressed and stitched again on the other side, enclosing the first stitch line/seam.

French seams are best used on sheer and/or drapy fabrics. I recently almost bought an organza top at a thrift store but since it was a sheer fabric, you could see all the overlocked seam edges from the outside and I just couldn’t get past it lol. I wanted so badly for the top to have been made with French seams.
On the edge of your seat? Wait ‘till you read about edge finishes.
So there’s some overlap (heh ;) with edge finishes and seams as we discussed with pressed open plain seams that utilize an overlocked edge finish at the seam allowances (reference Prada pants). But let’s dive into solely edge finish methods, starting with binding.
Bound to love binding.
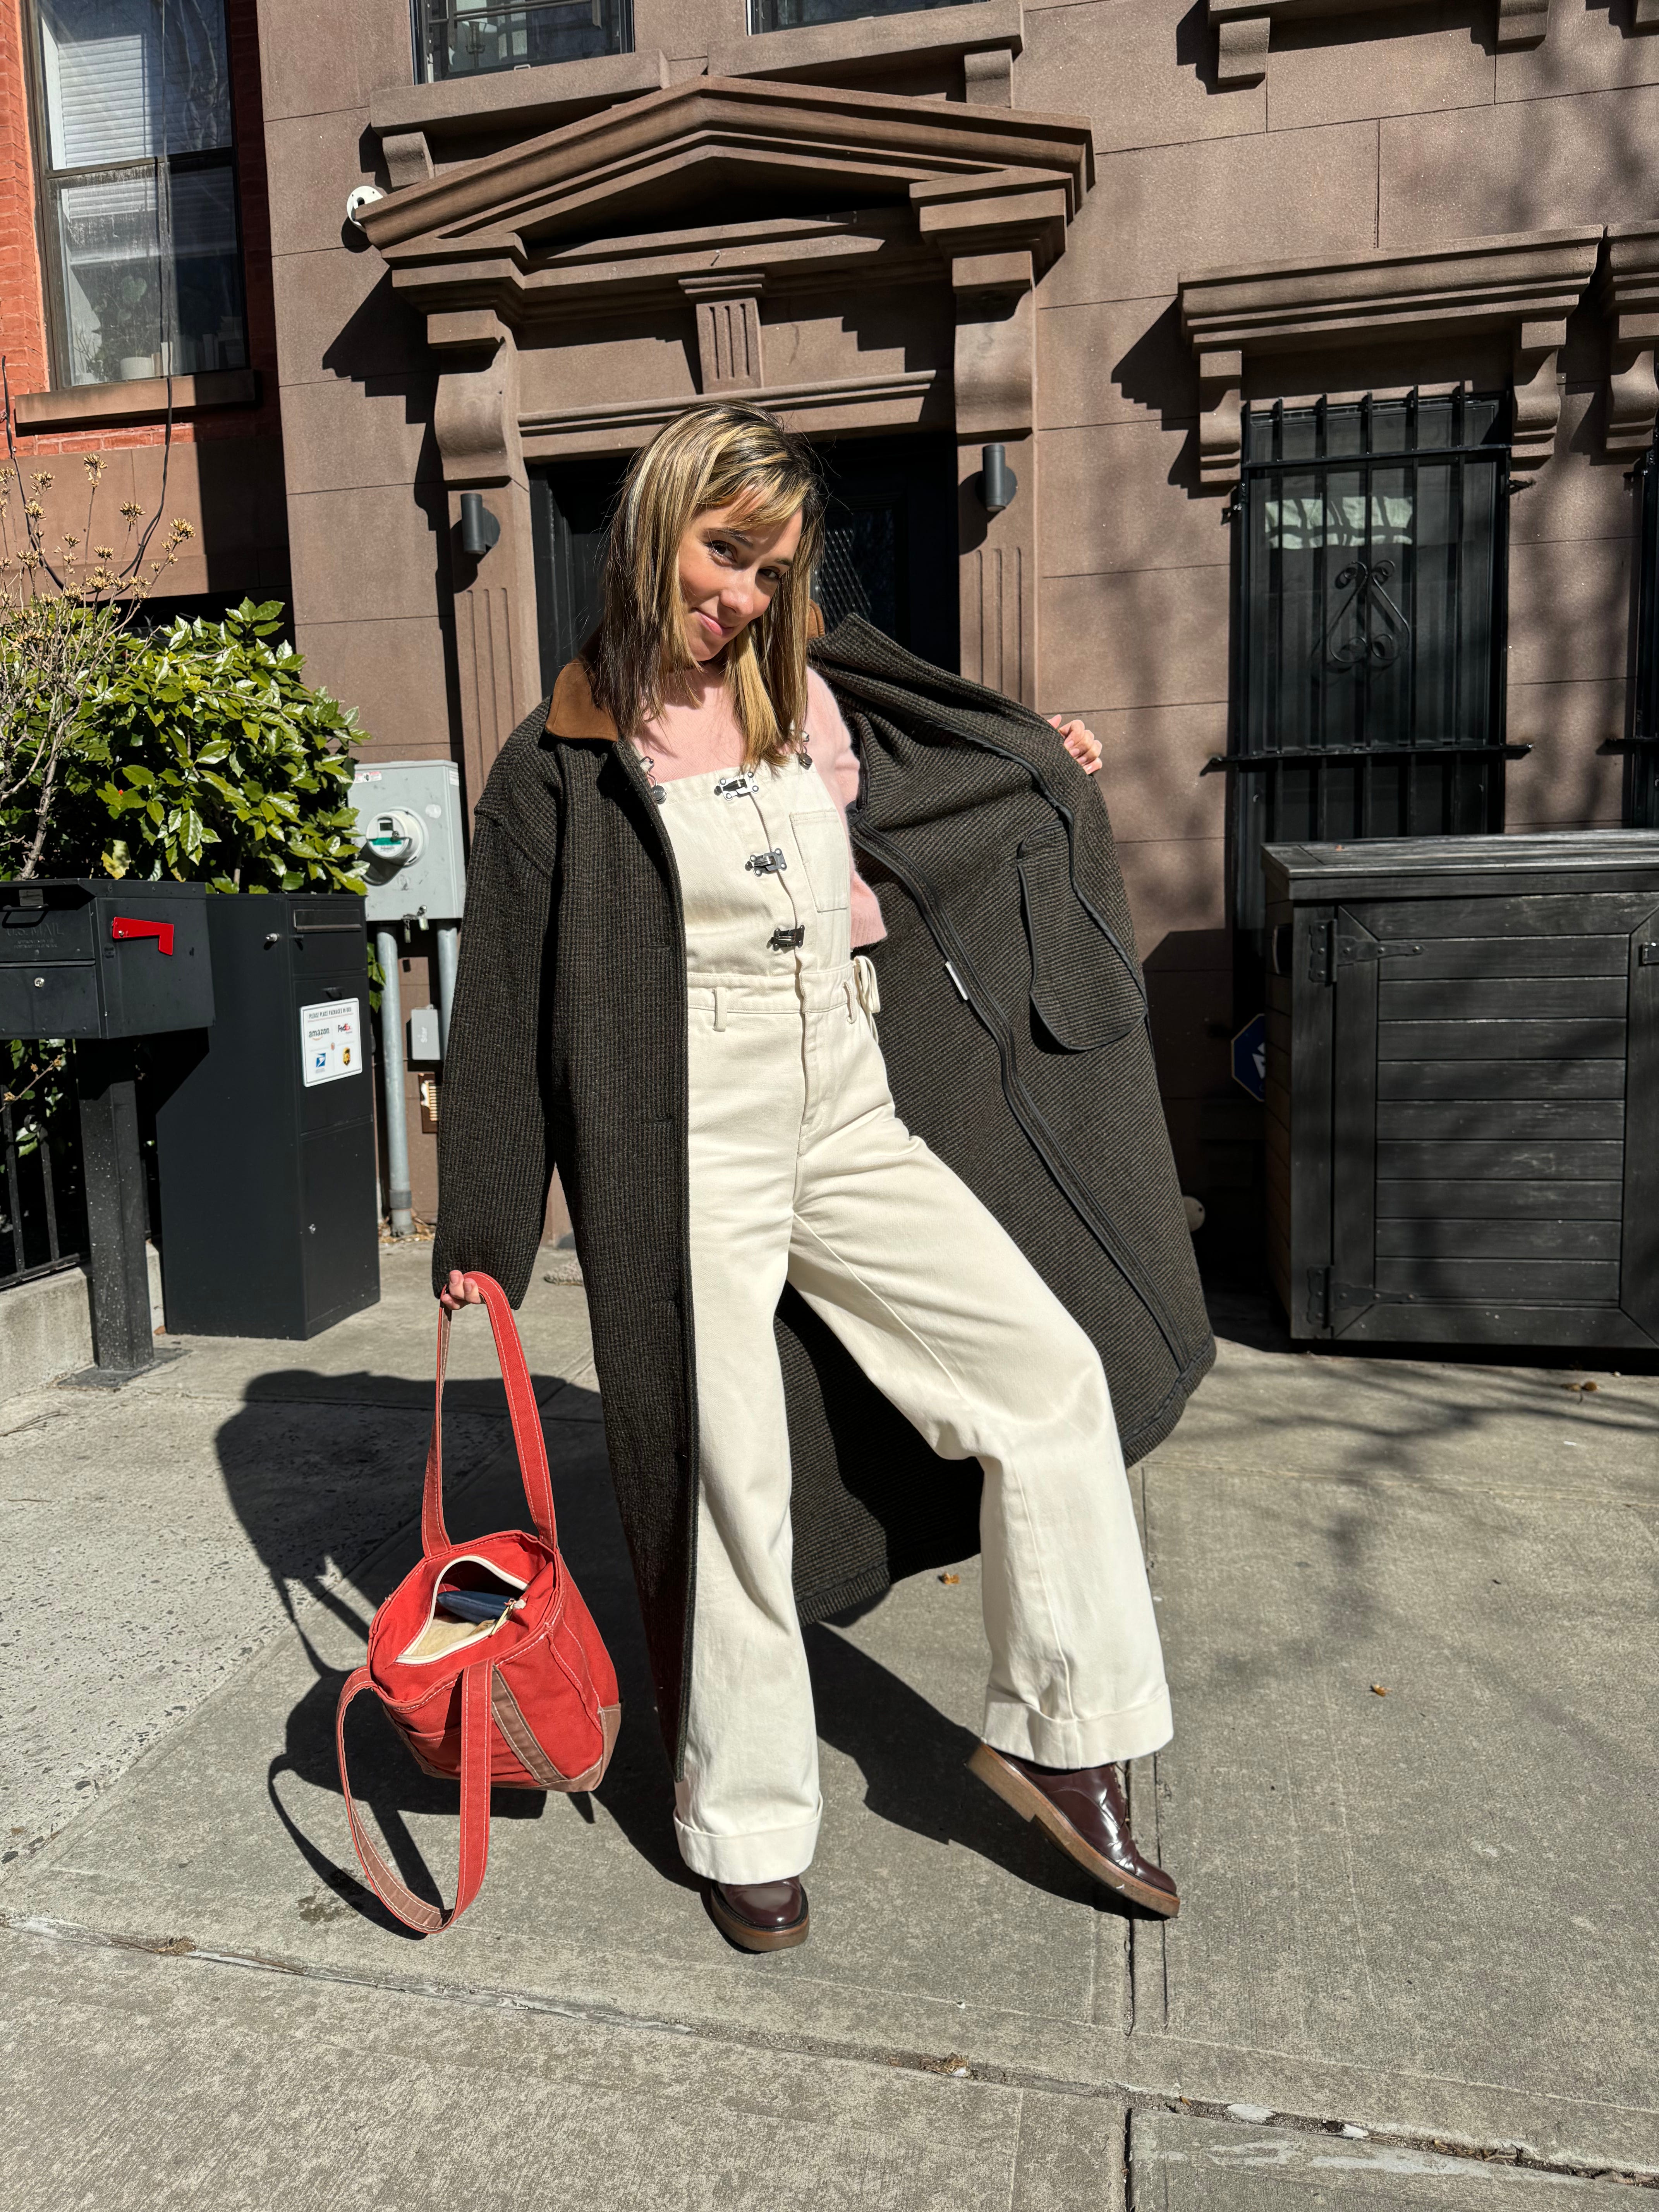
Binding is just like it sounds—you bind SAs with a separate fabric, often of a lighter-weight. You can even buy bias (cut at 45 degree angle) binding to make this type of edge finish easier because remember bias cut anything has more mobility and stretch so it functions well along high-movement areas. Binding works great at a fly shield edge (see below on my Villeine LeRoy Overalls), or at a waistband seam attachment, and countless other garment seam locations. However binding can stick out from the garment, so it is not best at armholes or areas where there is a lot of “fit action” (can I coin this term), as it can cause the garment to stand away from the body in a weird way. Like any clean finish or specialty clean finished seam, binding adds to garment cost because it is another order of operation; leaving the seam allowance edge overlocked will always be quicker, cheaper and easier.

Let’s facings it: facings are sometimes necessary.
I have a love/hate relationship with facings. I basically only love them when they are turned under and stitched down (so there is no visible raw or overlocked edge). Or, if not stitched down, I only like a facing at the waistband, (like unto a waistband curtain)—and in this case, still with the unfinished edge pressed neatly under so it is not visible. Annoyingly, so many vintage garments in the women’s tops & dresses categories use loose-hanging facings.

Facings are an edge finish that mimic the outer shape of the area they are finishing, i.e. curved armhole on a sleeveless top, or scoop neckline, and they are usually 1” or wider. Stitched down clean finished facings add extra processes: pressing and another run under the sewing machine. You can guess by now, like all the visually-pleasing seam+edge finish methods I’ve covered thus far, that any extra construction details—like clean finished, turned under & stitched-again facings’ edges—add to garment cost. Oppositely, in my least favorite facings’ construction technique, are those LHF(loose hanging facings) that creep up and show themselves on the outside of the garment after washing, or maybe even while you’re wearing the LHF-offending-garment. If you’ve ever experienced this, you know it can be tedious as hell to keep pushing the facings back down. This frustrating occurrence is another reason I like to say (stitched) down, boy! to facings.
Don’t be blind to blind hems.
Ah, to finish a hem; arguably the least favorite part of any sewing experience because it takes forever (if it’s a skirt or dress) and it isn’t design-rewarding. But, given my initials are H.E.M., it is an essential part of the quality garment-making procedure that I must care about!
Depending on the garment design, there are countless hem finishes and they range in similarity to other edge finishes I’ve outlined already. From what I’ve touched on, turned under & stitched facings are the most directly related to the majority of hem finishes—you can literally make a hem that’s finished with a facing (see up two images above, on my plaid skirt)—neat, huh! But for most trouser styles and gowns, a blind hem is preferable because you can’t see it [any stitching] from the outside.

Industrial blind hem machines are commonplace for garment manufacturers, and in these cases, at the inside of the garment, you’ll see either: an overlocked edge, or—depending on the fabric & design—turned under and then stitched (without the raw/overlocked edge showing). TECHNICALLY you can see little stitches on the outside with a blind hem, but they are nearly invisible. For at-home, or for a category like bridal, hand-done blind hems are the only way to go because you have complete control at a couture level. Blind hem tape (pictured above, left) is a separate trim, used to clean finish the raw edge, instead of overlocking. It’s an old-fashioned technique but I find the use of bind hem tape to be a beauuutiful look on a full, flared skirt where you don’t want topstitching shown on the outside, or overlock shown on the inside.
All patternmaking images are from my handy-dandy textbook: Patternmaking for Fashion Design by Helen Joseph-Armstrong, (2010). And all sewing construction clippings I have kept for 14 years with their accompanying sewing samples I made as references via class assignment. The directions on the clippings are from my amazing former teacher at Oregon State University, Ann Vong, who taught me how to sew. Shout out to Ann! <3
Note that all seams and edge finish treatments discussed today live under the woven garment umbrella—cut-and-sew knits and fully fashioned sweaters are separate.
No shopping links this week for obvious reasons; but if you’re buying second hand online, it helps to ask the seller for interior views of the garment.
In summary, maybe, like so many other areas in life (paying attention to the ingredients in your food comes to mind), you’ll now start to notice more how the clothing you wear was made. And if you’re bold enough, possibly you’ll even dance with your clean finished blind hemmed skirt revealed. xHannah
Love that in clothing construction the term, “order of operation” is used just like in mathematics!